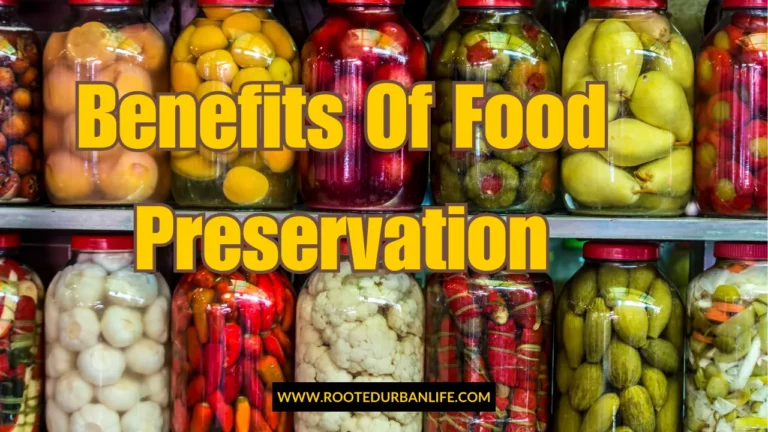
Dehydrated Meals for Camping: Easy, Delicious, Backpack-Ready
Let’s be honest: eating well while camping or hiking is either expensive or a total mess. You pack too much. You waste food. And you end up choking down soggy noodles or overpriced freeze-dried meals.
Here’s the truth: dehydrating your own food is the smartest hack nobody’s telling you about. It’s lighter. Cheaper. Tastes better. And it gives you total control over what you eat — whether you’re on a mountaintop or stuck in a power outage.
This isn’t just about prepping meals. It’s about owning your time, your money, and your independence. Let’s break it down step by step — no fluff, no filler. Just real, actionable stuff you can start doing right now.
WHY DEHYDRATE FOOD FOR OUTDOOR ADVENTURES?
Freedom You Can Eat
When you dehydrate your own food, you’re not just saving money — you’re buying back your freedom.
- No more hauling coolers full of melting ice.
- No more overpriced, bland pre-packaged junk.
- No more wondering if your food will survive the trip.
Dehydrated meals are lightweight, compact, and shelf-stable — which means you pack less and eat more (and better).
Imagine having an entire weekend’s worth of meals in one tiny bag. No spoilage. No heavy lifting. Just good food and good planning.
It’s Not Just for Hardcore Preppers
Whether you’re car camping with the family, going off-grid for a few days, or just want peace of mind during an emergency, dehydrated meals give you options.
You control the ingredients, the portions, the flavor — and the outcome.
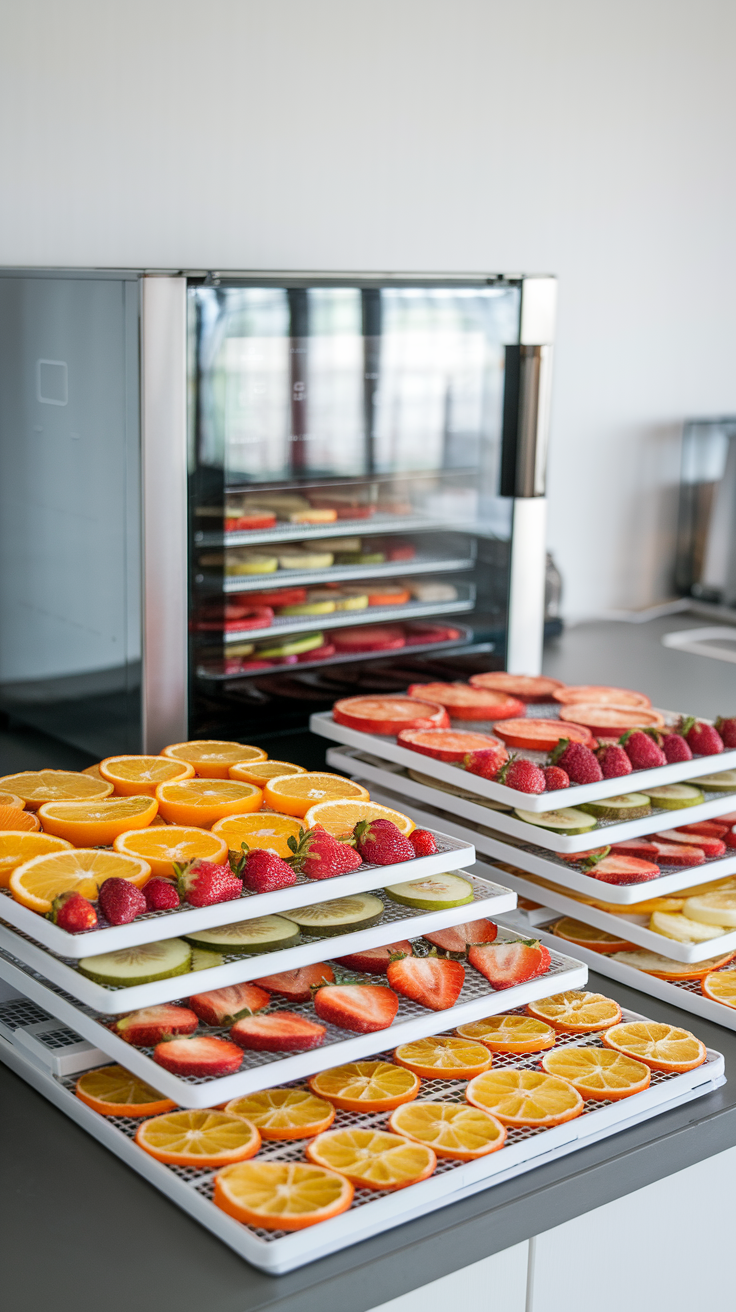
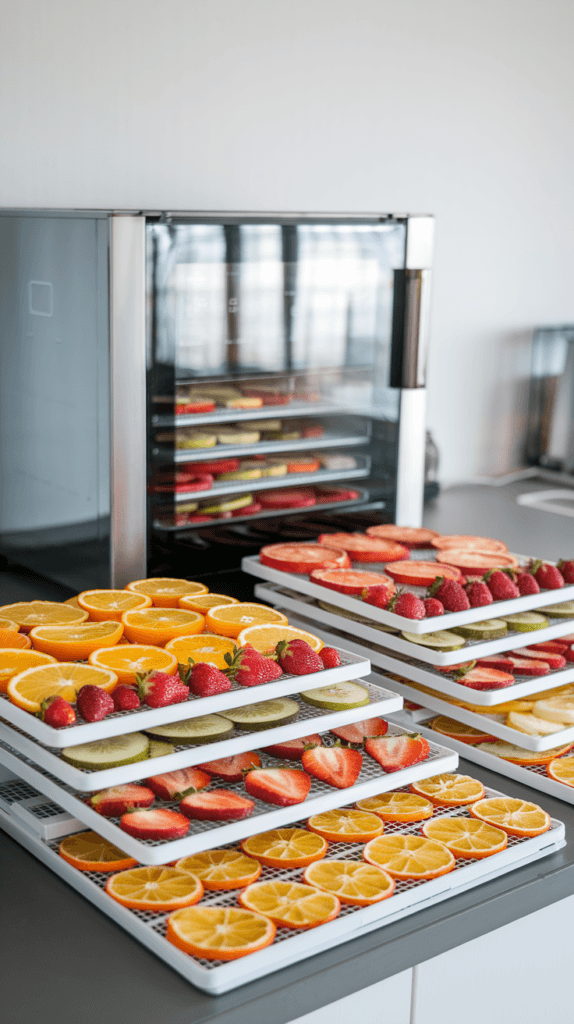
GEAR AND SETUP — WHAT YOU ACTUALLY NEED
Start Simple, Stay Smart
Let’s kill the myth right now: you don’t need a $500 dehydrator to get started. That’s just consumer brainwashing.
Here’s what actually matters:
- A decent dehydrator – Start with a reliable model like the Nesco Snackmaster or Excalibur if you’re feeling fancy. Even a budget-friendly one off Facebook Marketplace can do the job.
- Sharp knife + cutting board – You’re going to be slicing thin and even. Dull knives = frustration and uneven drying.
- Storage bags or vacuum sealer – Keep it dry, keep it tight. Ziplocks with oxygen absorbers work in a pinch. Vacuum-sealing = next level.
🛠️ Pro tip: Got an oven with low-temp settings (under 170°F or 75°C)? You can test the waters with that before buying anything. Just crack the door open and go.
Bonus But Not Necessary (Yet)
- Fruit leather trays or mesh sheets – For sauces, soups, and sticky stuff. Trust me, you’ll want these once you get obsessed (and you will).
- Kitchen scale – For dialing in portion sizes if you’re tracking weight for backpacking. Or just like nerding out.
WHAT TO DEHYDRATE — NO, YOU DON’T NEED FANCY RECIPES
Think in Categories, Not Recipes
Most people overcomplicate this part. Here’s the secret: don’t start with recipes — start with components.
You’re building meals, not creating a 5-star dining experience.
🧩 Break it down like this:
- Proteins – Ground beef (precooked + rinsed), shredded chicken, lentils, tofu, beans.
- Veggies – Peas, carrots, corn, spinach, zucchini, bell peppers. Blanching helps with color + texture.
- Carbs – Cooked rice, pasta, couscous, mashed potatoes. Yes, mashed potatoes.
- Flavors – Tomato sauce (dehydrate into leather), soy sauce (spray + dry on sheets), herbs, bouillon powder.
Hack: Mix and match when you’re out there. One night it’s chili mac, the next it’s rice and beans with some crushed tortilla chips.
❌ What NOT to Dehydrate
- Avocado, butter, cheese – Too much fat = goes rancid or doesn’t dehydrate well.
- Raw eggs – Just don’t. Buy powdered eggs if you really want ‘em.
PREP & DEHYDRATE LIKE A PRO
Slice It Right
Look — if your pieces aren’t uniform, your drying times will be all over the place. One bite’s still chewy, another’s a crunchy chip. That’s amateur hour.
Here’s what you do:
- Slice thin – ⅛ to ¼ inch is golden. Thinner = faster drying.
- Keep it even – Use a mandoline slicer or channel your inner Zen and focus while cutting.
- Blanch certain veggies – Peas, carrots, broccoli? Quick boil, quick ice bath. Locks in color, speeds drying, improves texture.
Real talk: Prepping well is 80% of success. Don’t rush it. You’re building your future meals here.
Cook Before You Dry
Most stuff needs to be fully cooked before it hits the dehydrator:
- Cook your rice, pasta, quinoa, lentils — then dehydrate.
- Ground meat? Cook it, rinse off the fat, then spread it out to dry.
- Sauces? Simmer them thick, spread on nonstick trays, dry into fruit leather sheets.
Hack: Tomato paste becomes pizza sauce powder. Chili becomes trail magic. Think like a minimalist chef.
Load Up the Dehydrator Like You Mean It
- Don’t overcrowd trays — airflow is everything.
- Rotate trays halfway through if your model doesn’t self-circulate well.
- Set the temp:
- 125°F (52°C) for fruits/veggies
- 135°F (57°C) for meats + meals
- Time? 6–12 hours, depending on what you’re drying. It’s done when it’s crispy or leathery, not sticky or squishy.
⌛ Reality check: You can’t rush this. It’s not Uber Eats. Set it and forget it overnight — then wake up to fuel.
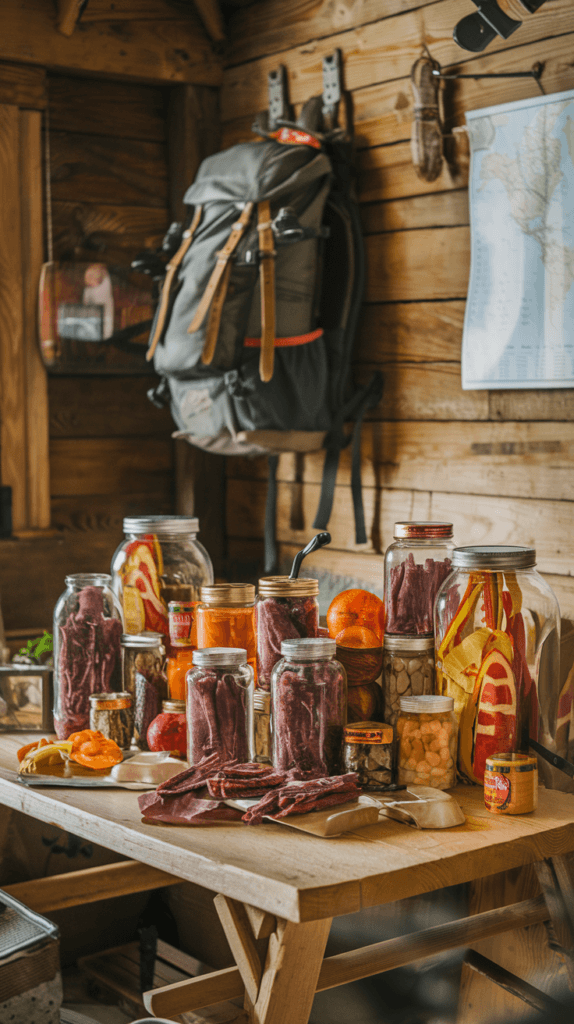
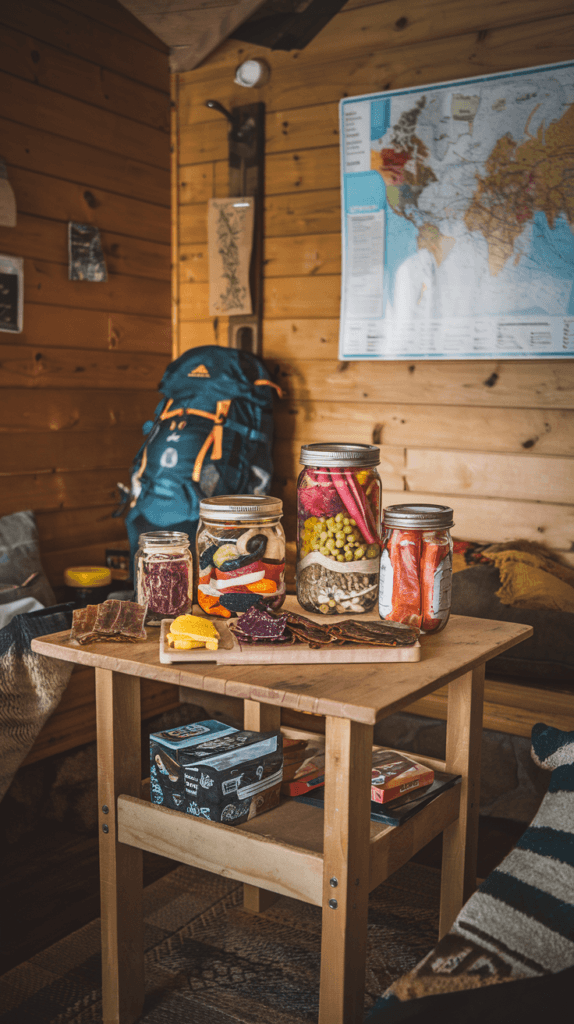
PACK, STORE & REHYDRATE LIKE A TRAIL CHEF
Ziplocks Are Cute. Mylar Bags Are LEGIT.
Look, if you’re just tossing your dried food into sandwich bags, you’re playing yourself. You want shelf-stable, moisture-proof, critter-proof meals?
Do this:
- Use Mylar bags with oxygen absorbers for long-term storage.
- For short trips? Vacuum seal or double-bag in freezer-grade ziplocks.
- Label everything — name, date, and rehydration instructions.
Pro Tip: Store bags in a bin with a silica gel packet if you’re in a humid climate. Moisture ruins dreams.
Portion Like a Pro — No Hangry Surprises
Dehydrated meals shrink like your laundry after a hot wash. A big tray of chili turns into a handful of flakes.
Solution:
- Measure by cooked volume before drying. If 1 cup of cooked chili = 1 meal, write it down.
- Pack 1.5x more than you think you’ll need. Trail hunger is real.
- Include extras like olive oil packets, cheese powder, or crushed nuts for calorie boosts.
Bonus move: Pre-mix breakfast and lunch portions in separate bags so you’re not digging through your bear canister half-asleep.
Rehydrate Without a Degree in Chemistry
This is where it all comes back to life — literally. But don’t just dump hot water and pray.
Here’s the system:
- Boil water, then pour directly into your meal bag or container.
- Start with a 1:1 water ratio, adjust based on food type.
- Let it sit 15–20 min in a cozy (think DIY foil pouch or jacket sleeve).
- Stir halfway, taste, tweak. Don’t be afraid to add seasoning — trail food loves flavor.
Pro move: If you’re cowboy camping or in cold weather, tuck your rehydrating food into your sleeping bag. Warm food + warm toes = happy human.
TOP 5 MEALS TO TRY FIRST (THAT ACTUALLY TASTE AMAZING)
🥣 1. Chili Mac — The MVP of Trail Food
Think beefy chili + cheesy mac = pure trail joy. It dries well, rehydrates beautifully, and punches hunger in the face.
How to make it baller:
- Use lean ground beef (fats = rancid fast).
- Add black beans, elbow pasta, tomato paste, chili powder.
- Dry it all together.
- At camp, stir in some shredded cheese or cheese powder for a creamy finish.
Why it slaps: It’s a one-bag wonder with protein, carbs, spice, and soul.
2. Coconut Curry Lentils — The Vegan Powerhouse
This isn’t bird food. This is rich, creamy, full-of-flavor fuel.
What to include:
- Cooked red lentils, coconut milk, curry paste or powder, sweet potatoes, and spinach.
- Spread it out to dehydrate evenly — lentils clump!
Level up: Add a scoop of instant rice or quinoa in the bag for a full meal.
3. Ramen Remix — 10x Better Than College
Instant ramen but make it sexy.
Trail chef edition:
- Toss the packet. Use your own bouillon, soy sauce powder, and sriracha powder.
- Add dehydrated mushrooms, green onions, and shredded rotisserie chicken or tofu.
For bonus umami: Drop in a soft-boiled egg right before eating. Game changer.
4. Pasta Primavera — When You Miss Real Food
Because you deserve veggies on trail that aren’t sad.
Key players:
- Cooked pasta, dehydrated zucchini, carrots, peas, bell peppers, garlic, and onion.
- Use a powdered alfredo or tomato sauce mix for the win.
Optional magic: A sprinkle of powdered parmesan (yeah, it exists).
5. Apple Pie Oats — Dessert Disguised as Breakfast
Comfort food that gets you out of the sleeping bag.
What goes in the bag:
- Rolled oats, dried apples, brown sugar, cinnamon, chia seeds.
- Add powdered milk or oat milk.
Pro tip: Add a crumbled graham cracker and a drizzle of almond butter for max comfort.
Key Takeaways — Your Go-To Guide for Dehydrated Food for Camping
- Lightweight and nutritious: Dehydrated meals save space and keep you fueled without weighing down your pack.
- Easy prep: Most recipes just need boiling water — no fancy cooking skills required.
- Customizable: Mix and match ingredients to fit your taste and dietary needs.
- Shelf-stable: Perfect for long trips or emergency kits.
- Comfort factor: From sweet oats to hearty soups, you can enjoy meals that feel like home even deep in the wilderness.
FAQ — Quick Answers Before You Hit the Trail
Q: How long can dehydrated food last?
A: Stored properly in airtight containers and a cool, dry place, dehydrated foods can last from 6 months to over a year.
Q: Do I need special equipment to dehydrate foods?
A: A food dehydrator helps, but you can also use an oven at low temperatures or even sun-dry if conditions allow.
Q: Can I rehydrate dehydrated food with cold water?
A: Cold water works but takes longer and may not fully soften tougher ingredients. Hot water is best for quick meals.
Q: Are dehydrated meals healthy?
A: Absolutely — when made with whole ingredients and minimal additives, they’re nutrient-dense and perfect for active outdoor lifestyles.
Ready to Simplify Your Camping Meals?
Dehydrated food for camping isn’t just a convenience — it’s a game changer. Whether you’re tackling rugged trails or weekend getaways, prepping your own lightweight meals means more energy, less hassle, and more time enjoying the wild. So grab your gear, pack some homemade favorites, and hit the trail with confidence!
If you found these tips helpful, don’t forget to follow us for more outdoor cooking hacks and share this post with your adventure crew. Got questions or your own favorite dehydrated recipes? Drop a comment below — let’s keep the conversation going!