Master Your Garden with Precision Seed Starting
Start Your Seed Starting Journey Now
Problems: Seeds started too early result in weak, leggy plants and wasted resources. Late starts mean crops that don’t mature before frost hits, reducing your harvest.
What You Will Learn: Work backward from your desired harvest to ensure perfect timing for each plant. Avoid common pitfalls by customizing your seed starting schedule to your local conditions and plant needs.

Why Choose Reverse Planning?
- Customization: Tailor your gardening to your exact climate and crop preferences.
- Efficiency: Save time, space, and resources with smarter planning.
- Success: Increase your yield and plant health with timing that works for you.
Benefits:
- Stronger, healthier plants from the start
- No more wasted seeds or resources
- More control over your gardening outcomes
- Seasonal gardening made simple
Starting seeds indoors should be straightforward, but for many gardeners, it becomes an exercise in frustration. Either the seedlings are leggy and weak by planting time, or they’re barely sprouting when they should be going into the garden. With our Reverse Planning Method, you can enjoy stronger, healthier plants, no wasted resources, and more control over your garden’s success.
Why Timing Maters
Proper timing in seed starting is all about about giving your plants the strongest possible start while maximizing your gardening resources. Here’s what you gain:
- Robust Plant Development: Seeds started at the optimal time grow into healthy, transplant-ready plants.
- Resource Efficiency: Avoid unnecessary expenses on lights and space.
- Maximized Yields: Ensure your plants are mature before frost hits.
If you start seeds too early, seedlings become leggy as they stretch for insufficient light, develop weak stems that can’t support healthy growth, and often become rootbound in their containers. These stressed plants typically produce less and may never recover fully after transplanting. Early starting also means unnecessary expenses on grow lights and heating, plus valuable indoor space tied up longer than needed.
If you start seeds too late, plants may not have time to mature before frost, leading to reduced harvests or complete crop failure. This is particularly critical for long-season crops like tomatoes, peppers, and eggplants that need every possible growing day to reach their full potential.
Timing also affects hardening off and transplant success. Well-timed seedlings are sturdy enough to handle the transition outdoors and have the right maturity to resist pests and diseases. They’re also more likely to establish quickly in the garden, leading to better yields and stronger plants overall.
Reverse Planning Method Explained
With the Reverse Planning Method, you begin planning starting with the target harvest date and work your way backwards to determine the seed starting date. This approach ensures your plants reach maturity at the optimal time for your growing zone and specific crops.
The method breaks down into three key components:
- Harvest Timing,
- Growth Periods,
- Weather Zones.
Start by identifying when you want to harvest each crop. For summer vegetables like tomatoes, this might be early August through September. For fall crops like pumpkins, you’ll aim for October. Once you have your target harvest date, subtract the crop’s days to maturity (found on your seed packet). This gives you your ideal transplant date.
From here, we implement the three-zone color system to organize your crops:
- Blue Zone (Cold weather crops): Includes lettuce, kale, and brassicas that can handle light frost
- Yellow Zone (Warm weather crops): Contains plants like tomatoes and peppers that need warm soil
- Red Zone (Hot weather crops): Features heat-lovers like melons and squash that require consistently warm temperatures
To find your seed-starting date, work backward from your transplant date. Consider:
- Seedling growing time (typically 4-8 weeks, depending on the crop)
- Hardening off period (7-10 days)
- Your zone’s last frost date
For example, if you want to harvest tomatoes in late August:
- August 20 (target harvest) – 75 days (maturity) = June 6 (transplant date)
- June 6 – 6 weeks (growing time) – 10 days (hardening off) = April 20 (seed starting date)
This reverse calculation ensures your seedlings are the perfect age when outdoor conditions are right, leading to stronger plants and better harvests.
Creating Your Personal Seed Starting Timeline
Your seed starting timeline begins with two critical pieces of information: your USDA hardiness zone and your local frost dates. Find your last spring frost date and first fall frost date through your local extension office or by checking historical weather data for your specific location.
With these dates in hand, create your personalized timeline:
- List your desired crops and group them by their temperature needs. Cool-season crops like broccoli can be started 10-12 weeks before the last frost, while warm-season crops like tomatoes typically need 6-8 weeks.
- Note each plant’s days to maturity and required growing conditions. Some plants, like peppers, need extra time indoors and warmer temperatures to germinate, while others, like zinnias, sprout quickly and grow rapidly.
- Factor in your indoor growing environment. Limited space or light might mean starting in waves rather than all at once. Plan accordingly to maximize your available resources.
Create a monthly calendar marking:
- Seed starting dates for each crop group
- Estimated transplant dates
- Succession planting intervals for continuous harvests
- Fall crop starting dates (counting backward from first frost)
Add a 7-10 day buffer for hardening off plants before their transplant dates. This timeline isn’t rigid – adjust it based on your local weather patterns and previous gardening experience.
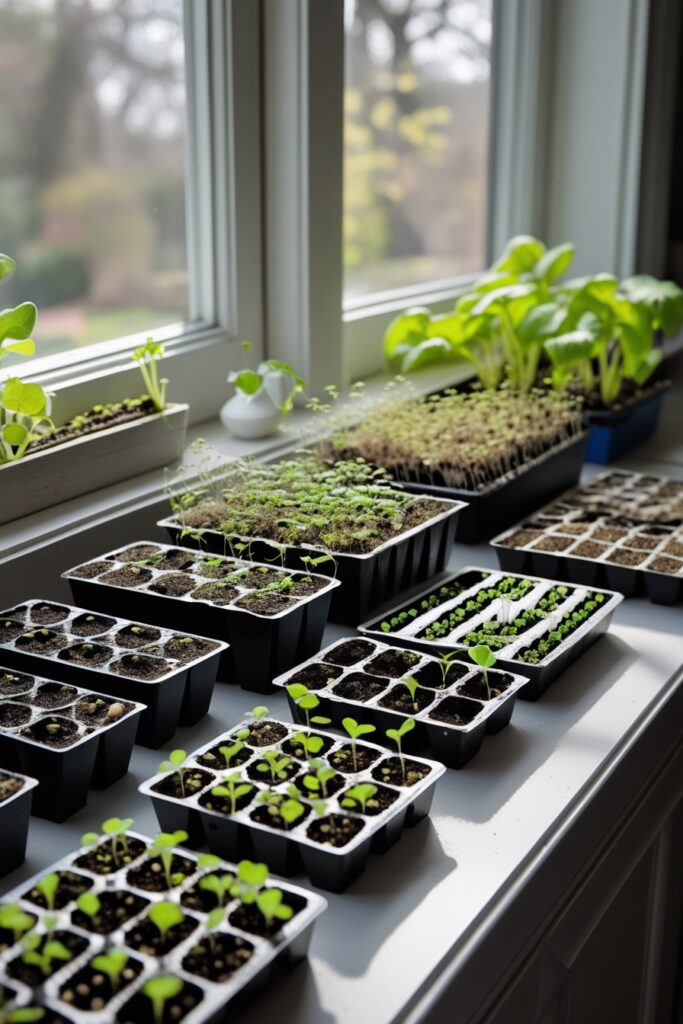
The Indoor Seed Starting Environment
Your indoor growing environment directly impacts your seedlings’ health and growth rate, which in turn affects your reverse planning timeline. A less-than-ideal setup might require starting seeds earlier to compensate for slower growth.
Light is your most critical factor. Seedlings need 14-16 hours of direct light daily. While south-facing windows can supplement lighting, most seedlings require additional grow lights positioned 2-4 inches above the plant tops, adjusting the height as they grow. LED grow lights offer energy efficiency and minimal heat output, making them ideal for home growers.
Temperature plays a dual role in seed starting. Most seeds germinate best between 65-75°F (18-24°C), with bottom heat mats speeding up the process significantly. After germination, slightly cooler temperatures (60-70°F/15-21°C) promote sturdy growth and prevent leggy seedlings.
Maintain consistent moisture using seed starting mix in containers with drainage holes. Create humidity by covering seed trays with clear domes until germination, then ensure good air circulation to prevent damping off disease. A small fan on low setting helps strengthen stems and reduce fungal issues.
Monitor your environment daily and adjust your reverse planning timeline if conditions aren’t optimal – seedlings in cooler temperatures or with less light may need an extra week or two to reach transplant size.

Practical Application
Let’s put the Reverse Planning Method into action, ensuring you reap the benefits of:
- Predictable Harvests: Know exactly when your garden will be at its peak.
- Reduced Guesswork: Eliminate the uncertainty from your gardening schedule.
- Enhanced Garden Management: Keep your garden running like clockwork.
Step-by-Step Implementation:
- Choose your crops and gather information:
- Note days to maturity from seed packets
- Record desired harvest dates
- List your frost dates
- Create your timeline using a popular crop like tomatoes:
- Target harvest: August 15
- Days to maturity: 75 days
- Growing time indoors: 6 weeks
- Hardening off: 10 days
- Working backward: Start seeds April 1
Real-Life Example: Sarah’s Spring Garden Plan
Sarah wanted summer tomatoes, fall pumpkins, and continuous lettuce. She started tomatoes 6 weeks before last frost, pumpkins just 3 weeks before (they grow faster), and planted lettuce in 2-week successions. Her tomatoes produced from July through September, pumpkins were ready for Halloween, and she had lettuce until winter.
Common Issues and Solutions:
- Problem: Leggy seedlings developing before transplant date
- Solution: Lower grow lights, increase air circulation, reduce fertilizer
- Problem: Seeds germinated too quickly, now too large
- Solution: Move to cooler location (60-65°F) to slow growth; transplant into larger containers if needed
- Problem: Growth slower than expected
- Solution: Add 1-2 weeks to future starting dates for that crop; check soil temperature and light levels
Remember: Your first year using this method serves as a learning experience. Keep notes on actual germination times, growth rates, and results to refine your timeline for next season. Adjust your reverse calculations based on your specific growing environment and local conditions.
Advanced Tips and Special Cases
Once you’ve mastered basic reverse planning, these advanced techniques will help you maximize your growing season and harvest potential.
Succession Planting Success
Instead of starting all your seeds at once, stagger plantings every 2-3 weeks for continuous harvests. For crops like lettuce and beans, calculate multiple start dates by working backward from each desired harvest window. Create a rolling schedule where new seedlings are ready just as older plants finish producing.
Managing Multiple Harvests
Some crops, like tomatoes and peppers, produce throughout the season. For these, timing your indoor start date affects when production begins rather than a single harvest date. Plan for your first ripe tomatoes about 30 days after transplanting, then expect continuous harvesting for 8-12 weeks.
Indoor-to-Outdoor Transition Mastery
Perfect your hardening off process by watching both the calendar and weather:
- Start the process when night temperatures consistently stay above 50°F
- Begin with 1 hour of outdoor exposure, doubling daily
- Choose overcast days for first exposure
- Time final transplant with overcast conditions or evening hours For fall crops, track soil temperature rather than just air temperature when transitioning outdoors – warm soil helps offset cooling air temperatures.
The Reverse Planning Method transforms seed starting from a guessing game into a precise, customized system for your garden. By working backward from your harvest dates, you eliminate common pitfalls and maximize your growing space and resources. Enjoy:
- A Customized Garden Experience tailored to your specific conditions.
- Increased Efficiency in your gardening practices.
- Guaranteed Success with healthier plants and larger harvests.
Frequently Asked Questions
Q: How do I know my USDA hardiness zone?
A: Check with your local extension office or use online tools that provide data based on your zip code.
Q: What if my seedlings are still too small by the transplant date?
A: You can extend the indoor growing period by adjusting your lights and environment, or consider using larger containers for continued growth.
Q: Can I use this method if I’m new to gardening?
A: Absolutely! This method is designed to help beginners avoid common mistakes by providing a structured approach to seed starting.
Q: How often should I adjust my seed starting dates?
A: Initially, you might need to adjust based on outcomes, but after a year or two, you’ll have a refined schedule that works for your specific conditions.
Q: What if I don’t have grow lights?
A: While grow lights are ideal, you can start with a sunny window, but be prepared for slower growth and possibly extending your indoor period.